Open5GS and srsenb
4G end to end communication demo using hardware equipment with Open5GS and srsRAN.
This setup uses 2 helm charts generated by Gradiant: open5gs and srs-enb. These charts are packaged and available at Gradiant’s DockerHub repo: https://hub.docker.com/u/gradiant
If you want to have the repo in local you can pull it:
helm pull oci://registry-1.docker.io/gradiant/open5gs --version 2.0.8
helm pull oci://registry-1.docker.io/gradiant/srs-enb --version 0.1.2
Equipment requirements
The following hardware equipment is required in order to replicate the setup used for this tutorial:
- USRP Software Defined Radio Device, which is supported by the UHD (USRP Hardware Driver) Software. In our setup, an Ettus USRP B210 was used.
- UE (User Equipment) suitable for connecting to this network deployment. In our setup, a mobile phone (Huawei Mate 20 X) was used.
- Sysmocom USIM with known credentials inserted into the UE. The one used in our setup was a sysmoISIM-SJA2.
It is recommended to keep the UE with the airplane mode turned on until the EPC and RAN have been successfully deployed and connected.
Additional Requirement: ettus-device-plugin Daemonset
You need another prerequisite in your Kubernetes cluster in order to complete this deployment successfully. You will have to deploy an ettus-device-plugin Daemonset that is meant to manage the USRPs as Kubernetes Node Resources and automatically mount them in the corresponding Pods.
Go to https://github.com/Gradiant/ettus-device-plugin, where you will find additional information and where the corresponding Kubernetes manifest is located (ettus-daemonset.yaml). Then, execute the following command in order to create the corresponding Kubernetes resource:
kubectl apply -f https://gradiant.github.io/5g-charts/docs/open5gs-srsenb/ettus-daemonset.yaml
After this is completed, you can rely on Kubernetes to place the device plugin’s Pod onto Nodes, to restart the daemon Pod after failure, and to help automate upgrades.
Deployment EPC and registration of subscriber
First, deploy the EPC (open5gs) using the epc-values.yaml file provided in order to overwrite some of the default values of the Open5GS chart:
helm install open5gs oci://registry-1.docker.io/gradiant/open5gs --version 2.0.8 --values https://gradiant.github.io/5g-charts/docs/open5gs-srsenb/epc-values.yaml
These new values will:
- Disable the Open5gs NGC, deploying only the components of the Open5gs 4G/5G NSA Core.
- Set the MCC, MNC and TAC to be used by the MME. Take into account that these values are tied together with the sysmocom USIM’s credentials.
- Disable the Ingress for accessing the Open5GS WebUI.
- Enable the populate option, which will create a Deployment using the
gradiant/open5gs-dbctlimage. This will provide an easy way to manage the subscribers. In addition, the initCommands specified will register an initial subscriber in the EPC, with the imsi, key, opc and apn provided. Thus, these parameters must be set accordingly to the credentials configured in the sysmocom USIM: make sure that the values provided in this command match those of your USIM before installing the chart.
It is also important to notice that the first 5 or 6 digits of the IMSI correspond to the MCC (first 3 digits) and MNC (2 or 3 following ones). Therefore, they must match the ones previously configured for the MME as well.
Once this deployment has been completed, the subscriber’s registration can be verified following 2 different approaches:
- Directly through MongoDB
kubectl exec deployment/open5gs-mongodb -ti -- bash

mongo

use open5gs

db.subscribers.find().pretty()
- Using the Open5GS WebUI: forward a local port to a port on the corresponding Pod by specifying the WebUI Service. Then, the Open5GS WebUI will be available at
localhost:3000. To do this, execute:kubectl port-forward svc/open5gs-webui 3000:3000
Deployment RAN
Before installing the corresponding helm chart, make sure of having properly connected your USRP to one of your cluster’s nodes.
Now, deploy the RAN (srs-enb) using the enb-values.yaml file provided in order to overwrite some of the default values of the srs-enb chart:
helm install srs-enb oci://registry-1.docker.io/gradiant/srs-enb --version 0.1.2 --values https://gradiant.github.io/5g-charts/docs/open5gs-srsenb/enb-values.yaml
Thus, this deployment will launch the eNodeB and connect it to the Open5GS EPC.
It is important to notice that the default values of MCC, MNC, and TAC set for the eNB match those configured in the open5gs chart. Also, take into account that the value given for enb.mme must match the name of the corresponding MME service deployed by the open5gs chart. Therefore, in case you use a differente release name for the open5gs chart, make sure that this value is set accordingly.
Notice as well that the enb-values.yaml configures the srs-enb chart for requiring a USRP hardware resource during its deployment.
Verify EPC and RAN connectivity
Connection between PGW-C and PGW-U (C-Plane and U-Plane of EPC)
Check that the PGW-C (SMF component) gets associated with the PGW-U’s (UPF component) address:
kubectl logs deployment/open5gs-smf -f
Connection between MME and eNodeB
Check that the MME accepts and adds the eNodeB:
kubectl logs deployment/open5gs-mme -f

Connect UE to the network
Once the EPC and RAN are deployed and successfully connected as shown above, the UE will be able to connect to the network. Make sure that it has de sysmocom USIM with the registered credentials correctly inserted.
Also, check the APN configuration in the UE. It has to be enabled the following APN:
- APN name: internet
- APN: internet
- APN type: default
- MCC and MNC matching those previously set for the MME
At this point, you can turn off the airplane mode in the UE so it starts attempting to connect to the network.
Verify UE’s connectivity
Check that the eNodeB senses UE’s presence and the UE gets connected to the network:
kubectl logs srs-enb-srs-enb-0 -f

Check that the UE got successfully attached to the network:
kubectl logs deployment/open5gs-mme -f


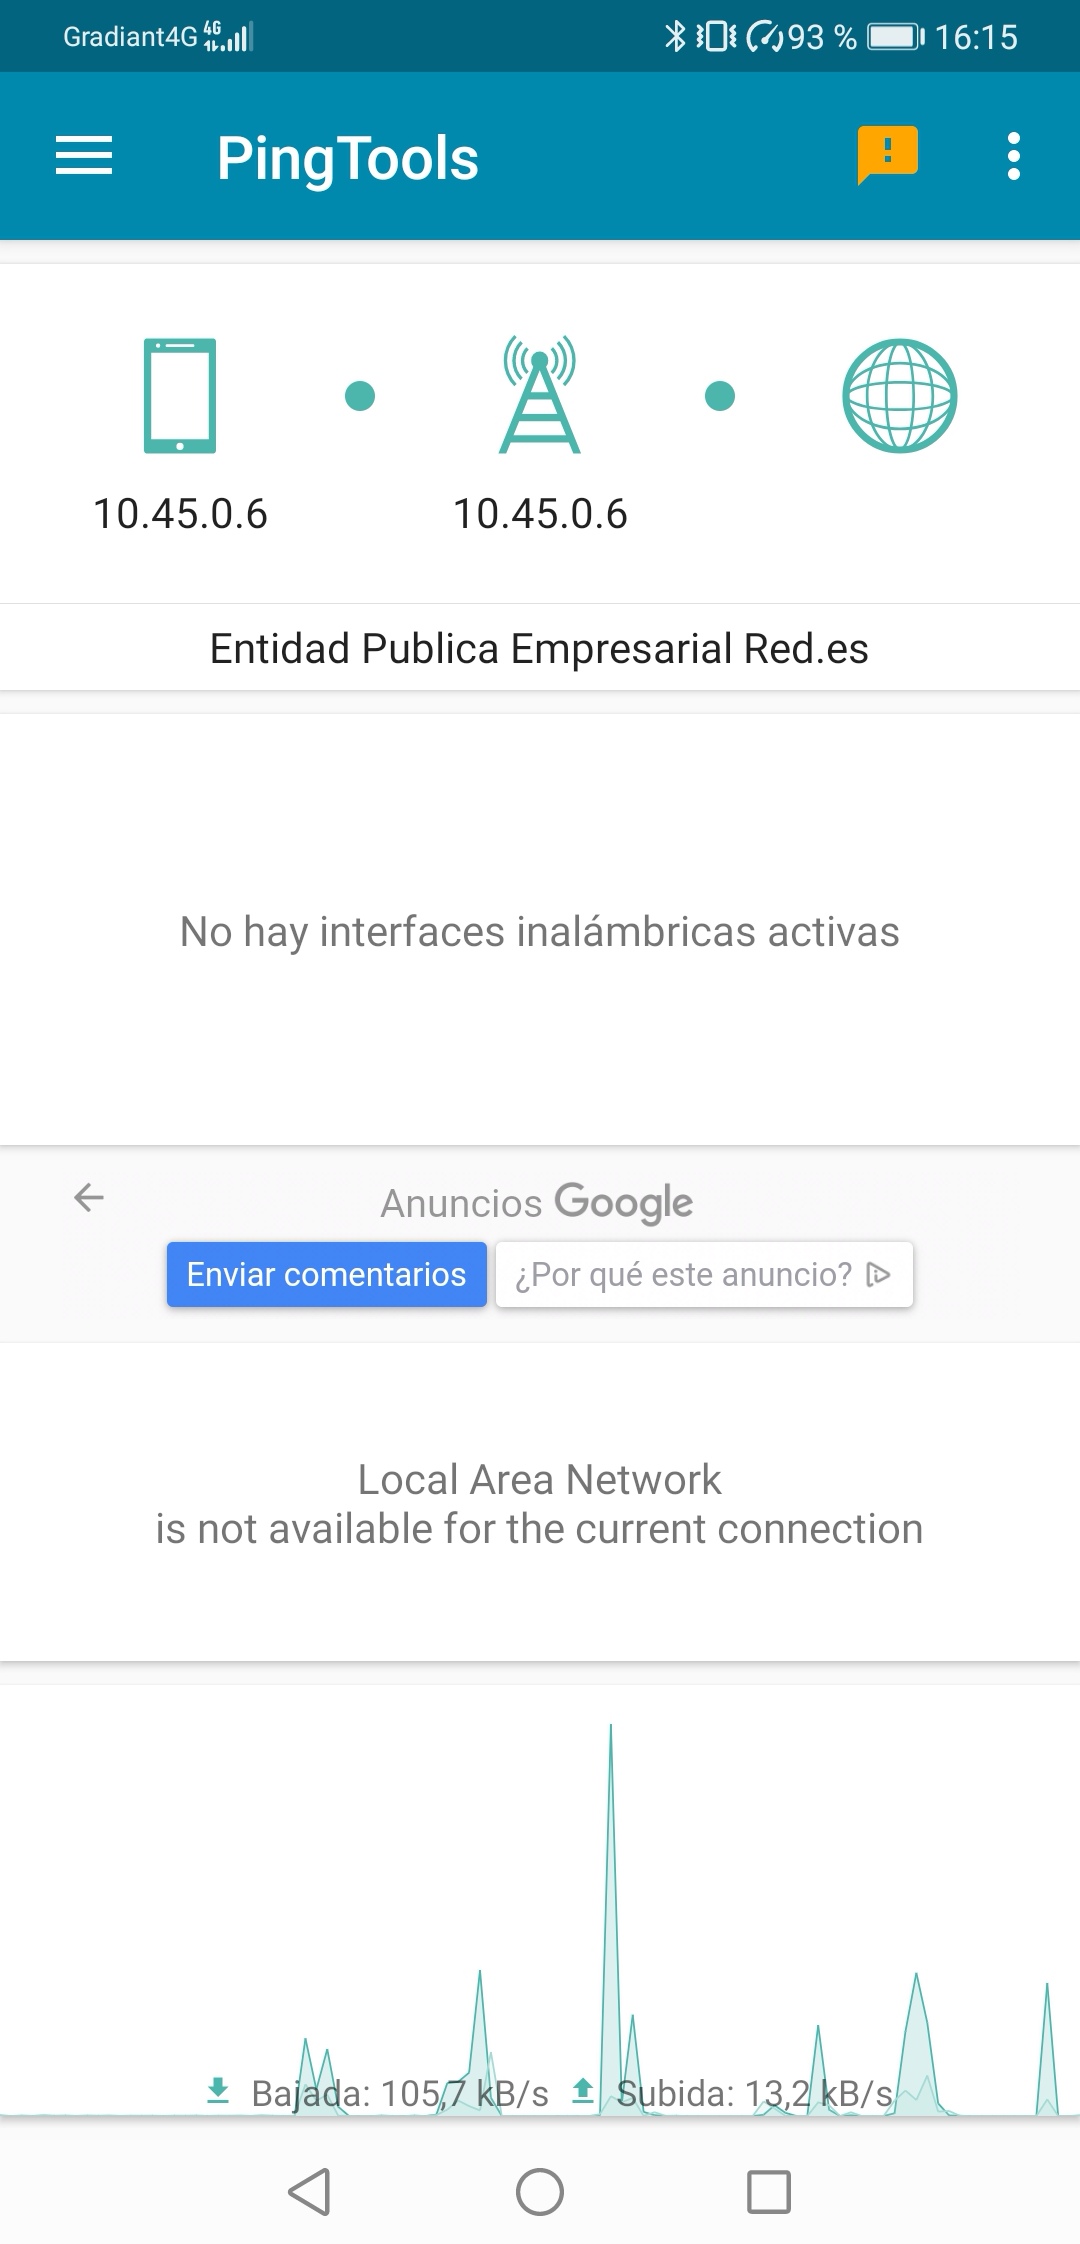
We installed and used the PingTools application in the UE in order to test the UE’s connectivity. Open this application and check that UE was assigned an IP address and it is connected to the eNodeB and to the Internet:

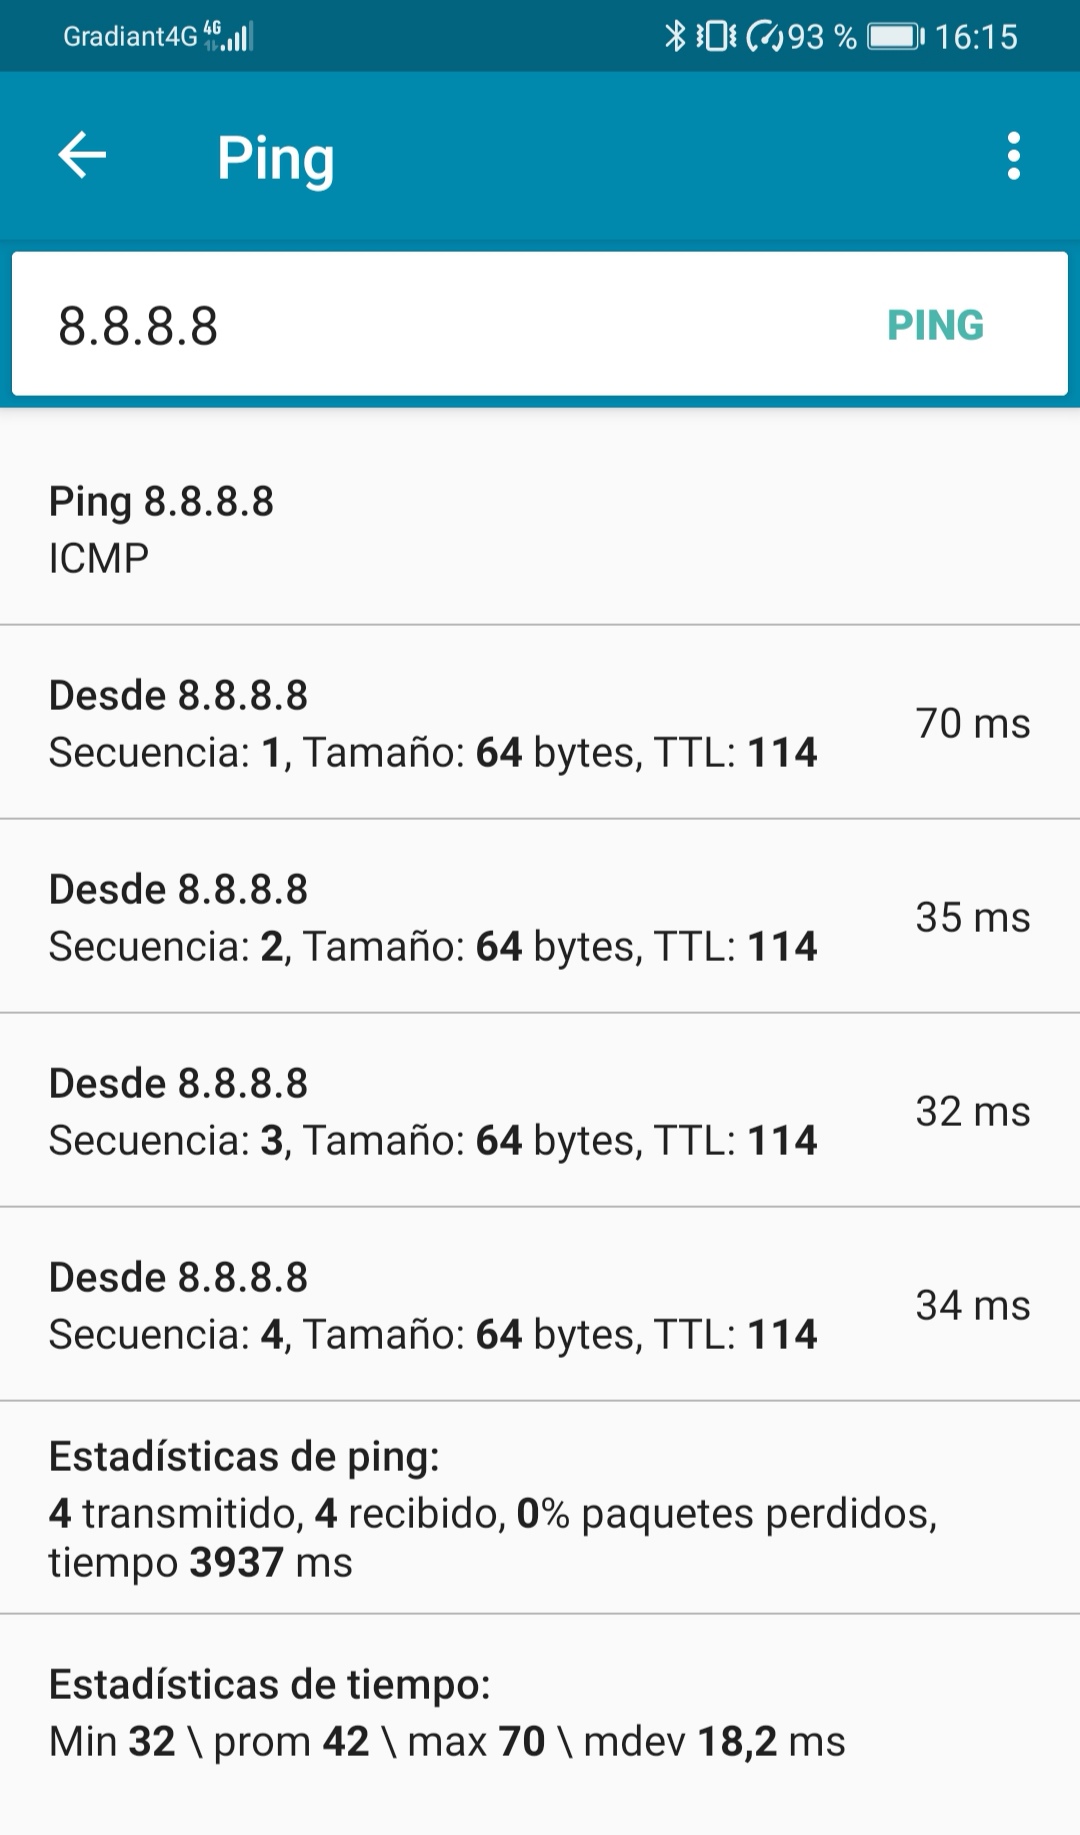
Through the ping section of the app, you can easily test the UE’s connectivity to the Internet:

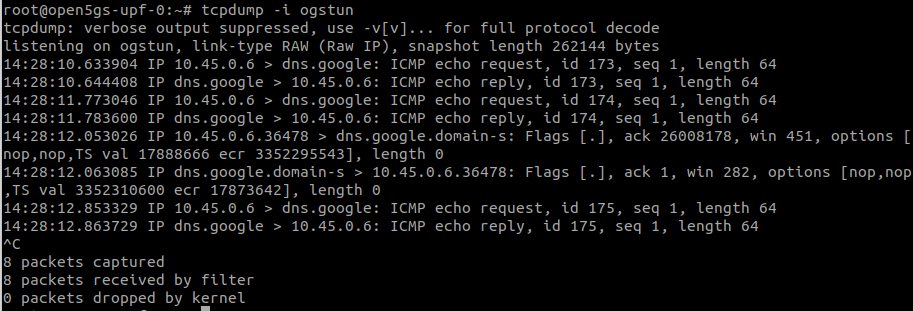
Therefore, the UE’s traffic can be captured in the PGW-U (UPF). The installation of tcpdump in the corresponding pod is needed in order to complete this check:
kubectl exec deployment/open5gs-upf -ti -- bash

apt update && apt install tcpdump

tcpdump -i ogstun


Clean
Clean the deployment for this demo by uninstalling the 2 helm charts previously installed:
helm uninstall srs-enb

helm uninstall open5gs