Open5gs and PacketRusher
5G end to end (SA) communication demo with Open5gs and PacketRusher.
This setup uses 2 helm charts generated by Gradiant: open5gs and packetrusher. These charts are packaged and available at Gradiant’s DockerHub repo: https://hub.docker.com/u/gradiant
If you want to have the repo in local you can pull it:
helm pull oci://registry-1.docker.io/gradiant/open5gs --version 2.2.0
helm pull oci://registry-1.docker.io/gradiant/packetrusher --version 0.0.1
Deployment NGC and registration of subscribers
First, deploy the NGC (open5gs) using the 5gSA-values.yaml file provided in order to overwrite some of the default values of the Open5GS chart:
helm install open5gs oci://registry-1.docker.io/gradiant/open5gs --version 2.2.0 --values https://gradiant.github.io/5g-charts/docs/open5gs-packetrusher/5gSA-values.yaml
These new values will:
- Disable the Open5gs EPC, deploying only the functions of the Open5GS 5G SA Core.
- Enable the populate option, which will create a Deployment using the
gradiant/open5gs-dbctlimage. This will provide an easy way to manage the subscribers. In addition, the initCommands specified will register one subscriber initially, with the imsi, key, opc, apn, sst and sd provided. - Disable the Ingress for accessing the Open5GS WebUI.
Deployment RAN
Now, deploy the RAN (packetrusher):
helm install packetrusher oci://registry-1.docker.io/gradiant/packetrusher --version 0.0.1
Thus, this deployment will not only launch the gNodeB, but it will also enable the launching of 1 UE.
It is important to notice that the default values of mcc, mnc, sst, sd and tac match those configured in the open5gs chart and the registered UEs.
In addition, take into account that the value given for amf.hostname must match the name of the correponding AMF service deployed by the open5gs chart. Therefore, in case you use a differente release name for the open5gs chart, make sure that this value is set accordingly.
Verify deployment
Connection between SMF and UPF (C-Plane and U-Plane of NGC)
Check that the SMF gets associated with the UPF’s address:
kubectl logs deployment/open5gs-smf -f
Connection between AMF and gNodeB
Check that the AMF accepts and adds the gNodeB:
kubectl logs deployment/open5gs-amf -f
Check that gNodeB establishes SCTP connection successfully and that the NG Setup procedure was successful as well:
kubectl logs deployment/packetrusher -f
UE’s connectivity
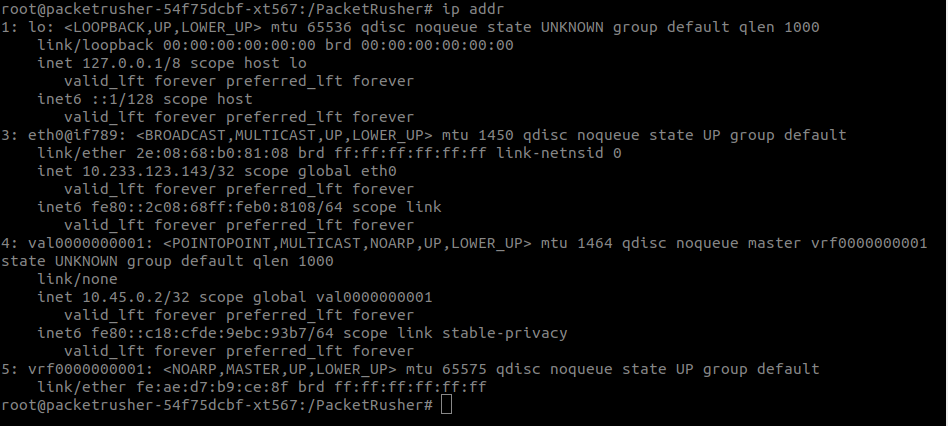
Check that UE established its PDU Session successfully:
kubectl exec deployment/packetrusher -ti -- bash

ip addr

Check that UE has connectivity through its interface:
ip vrf exec vrf0000000001 ping 8.8.8.8

Add additional subscribers using open5gs-populate
Once the NGC is deployed, we can register additional subscribers at any time by using the Deployment previously described:
kubectl exec deployment/open5gs-populate -ti -- bash
From there, we can register a new subscriber by executing the following command, providing the corresponding values for imsi, key, opc, apn, sst and sd:
open5gs-dbctl add_ue_with_slice <imsi> <key> <opc> <apn> <sst> <sd>
After that, the changes can be verified following 2 different approaches:
- Directly through MongoDB
kubectl exec deployment/open5gs-mongodb -ti -- bash

mongo

use open5gs

db.subscribers.find().pretty()
- Using the Open5GS WebUI: forward a local port to a port on the corresponding Pod by specifying the WebUI Service. Then, the Open5GS WebUI will be available at
localhost:9999. To do this, execute:kubectl port-forward svc/open5gs-webui 9999:9999
Clean
Clean the deployment for this demo by uninstalling the 2 helm charts previously installed:
helm uninstall packetrusher

helm uninstall open5gs